
Palette User Management
Account types
Palette supports a range of user accounts that allow differing permissions. All users permission is set with reference to a specified Region of View (ROV).
- Viewer – provides read-only access to data
- Admin – full admin rights
- Local Admin – Ability to create new user accounts
- Configurer – Can configure sites and devices, e.g. site location, point scaling, trend frequency etc
- Alarm Manager – Can acknowledge and accept alarms
User Admin
Within Palette user accounts can be created and managed using the User Admin tool. If you have a Admin or Local Admin account then you can access this by clicking on the settings cog found in the top right of any Palette screen
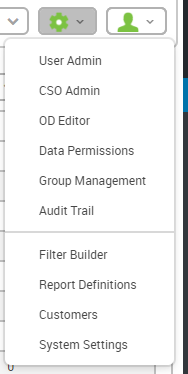
Creating Users
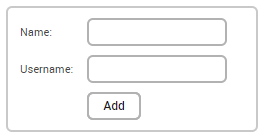
To create a new user click on the Add user button: 
Fill in the dialog located at the bottom of the page and Click the Add button
- Name: Full name of user
- Username: Set the user name used for logging into Palettte
User Configuration
With the new user created, we now need to set up their account by completing the fields to set up each field appropriately. These settings can be accessed at anytime to add or remove permissions or reset passwords etc.
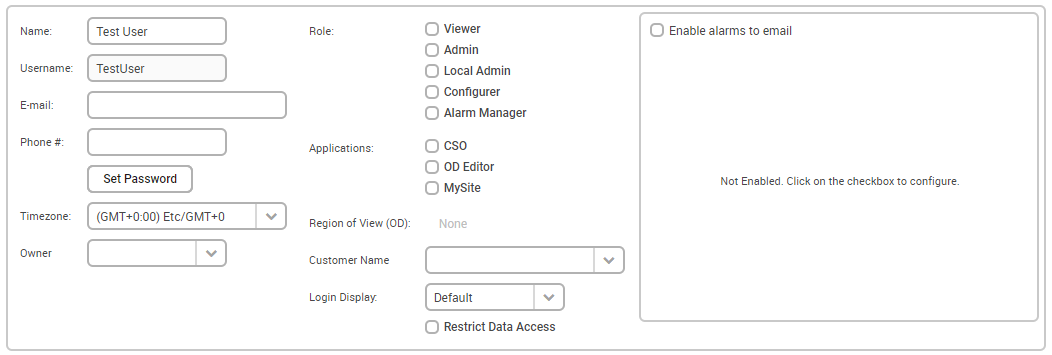
The Name and Username fields should be created as per the previous step,
- Email: Enter a contact email address for the user
- Phone: Enter a phone number for the user
- Set password: Set an initial password for the user. It is recommended that all users change their password when they log in for the first time.
- Timezone: Set the timezone that the user is based in. This setting ensures all data is presented in local time for that user. It is therefore recommended that this is set to the timezone that the equipment is installed.
- Owner: This is the person responsible for creating and managing this user account
- Role: Tick the role for this user account. Note that multiple options can be selected. e.g. Viewer and configurer.
- Applications: Tick to provide access to these applications. Note multiple options can be selected.
- Region of View: Click on the button to open a dialog to show all OD within view. Specify what data this user has access to by double clicking on the desired OD. Note that using the group hierarchy allows large estates to be split across multiple users.
- Customer name: Enter the name of the end customer. Designed for use by resellers who are managing multiple customers in a multi-tenancy system.
- Login Display: Select which application the user will see by default when they login:
- Default – Normal Palette home screen
- MySite – Used for installers who will be using the My Site application
- Restrict Data Access – What does this do?
Alarms to Email
In addition to setting up access on Palette, the system can also send alarms to users, that can be enabled and configured using the Alarms to email box
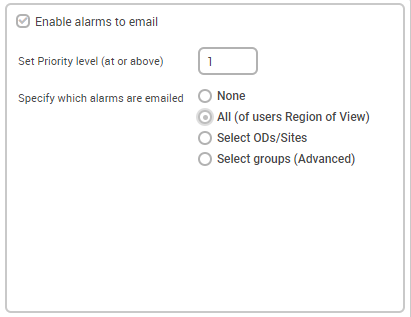
To enable, select the checkbox and complete the two configuration options:
- Priority Level – Alarms at or above this priority level will be sent by email – see more about Alarm Levels
- Which Alarms – Specify which OD at and below
- None – no group
- All under the users area
- Specific groups or sites
- Specific groups or sites and only particular functions
- e.g. All alarms associated with level data only. All other alarms are not sent via email.
Using these settings it is possible to be quite specific about which alarms are sent to which users.
Delete Users
To delete a user click on the Delete user button: 
Click Confirm on the next pop window to delete the user.


